
Gratitude journals seem to be all the rage these days. I did give it a go – bought a beautiful embossed journal to write in and everything – but to be honest I found myself writing similar things each day and every time I started I would lose interest pretty quickly. I’m a very visual person and love the idea of a board that I can refer back to every day – like a piece of artwork. Collage-style inspiration boards showcasing future goals and motivation are pretty commonplace, but what about creating a board of things to be grateful for that are already in your life?
When HP sent me their new Sprocket printer to try out, I thought this would be the perfect opportunity to make my own visual gratitude board showcasing all the things in life that I love and that I’m grateful for.
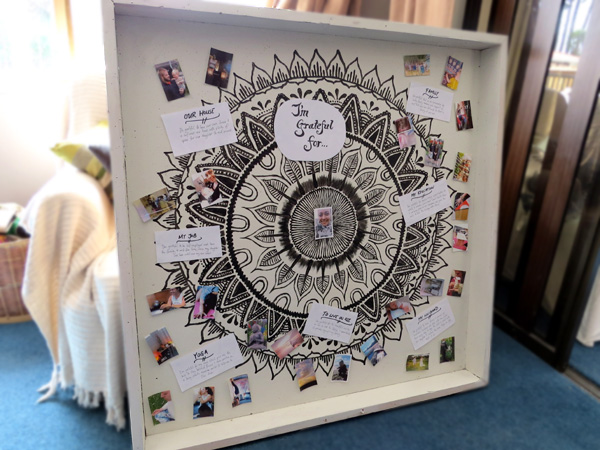
I started out with a large old wooden homemade dartboard (it was in a pile of stuff at home to go to the dump!) that I repainted white to use as a base, hand-painted a mandala onto it, added my images around set ‘themes’ of text, then added a few relevant extra tokens/mementos.

What you’ll need
- Something to build your gratitude board on. This could be an existing piece of artwork (like the canvases you can buy which already have pictures on). It could be a blank canvas that you would like to design from scratch. It could even just be a regular piece of paper. I’ve obviously made an enormous one but it can be any size you like!
- Photographs of the things in life you’re grateful for.
- Paper to write or print out your gratitude themes.
- Any other tokens/mementos you would like to stick to your board.

What are you grateful for?
Start by brainstorming on a piece of paper the things in your life you are grateful for. For me this included my family, my health, the beautiful country we live in, my access to learning and going back to school, the house I own with my husband, that I am self-employed and the flexibility that comes with working from home, and yoga.
Write them down in large text, or print them out, so that you can make brainstorm ‘themed’ areas on your gratitude board. Get creative with the fonts, font colours, paper shapes, paper type… Use your imagination.

Sort out your pictures
Print out the images you would like to use on your board. I made my pictures using the HP Sprocket – a pocket-sized thermal printer which connects to your phone via bluetooth and prints out small sticky-backed images.


Assemble your masterpiece
Time to put everything together! You can arrange your things however you like; I made themed areas around my board for each of the key areas of my life that I’m grateful for.
Once you’re finished, place your gratitude board somewhere you will see it often; it could be near your work desk, somewhere in your home, or even inside a locker. Take a moment to look at it and appreciate it every day.

Thanks to HP for providing the HP Sprocket printer that enabled me to create this gratitude board for this blog post.
The HP Sprocket is available in white and rose old, or black and silver, from hp.com.au (RRP $199).
Images / NZ Real Health